Table of Contents
Zethin's Guide to Strands
Strands
Gearing Up
Strands is by no means an easy zone. In fact, it's one of the three current zones with the ability to instantly kill any player (the others being Elite Strands and Star Cathedral). Don't let that dissuade you, as Strands is home to some of the best loot you can get in the game. This guide will hopefully get you to the point where you can acquire that gear.
Before starting Strands, I strongly recommend you play the Fungus Cave boss. A lot. To the point you can get through that boss without getting hit once if possible. The maneuvering on platforms will get you used to Strands' platform navigation without the risk of falling to your immediate death. I've seen more people die from falling than actually dying to the enemies. Yes, that includes players with high deed counts (I'm even guilty of this).
By the time you can efficiently start running Strands (or especially if you are running this for the first time and/or are shooting for the deed), then it's mandatory that you have maxed out your Jump Height, Speed, and Armor to at least Tier 2. You should preferably have maxed out your Tier 3 Damage and Armor as well by now. You can get the Tier 3 Damage and Armor stats from Underground Base if you haven't already.
Your gear is going to have to be up-to-snuff if you want to survive Strands. The below should be roughly what you want your gear to be at if you want a good shot at beating Strands. The gear won't guarantee your success, but it will significantly improve your odds versus the alternatives. That doesn't also mean the gear is mandatory. However, the gear below is what you should be aiming for in order to get the best chance at Strands (or if you can get even higher tier gear then all the better).
Wildfire
Weapon: Redshift Repeater with +100% AP and +2 shots. Preferably +100% Precision Secondary: Cluster with +100% AP, Barbed, and Trisected Special: Voracious Blast with +1 Air Blast Mobility: Empyreals – mods optional Body: Augmented Jerkin with +4 Movement Speed and +5% Damage Implant: Inferior Salites – optional
Duskwing
Weapon 1 (DPS): Polychrome Skein with +200 Spin Time and +5% Crit Chance Weapon 2 (Ex-leech): Nacre Skein with +1 Extra Hit and +1 HP Leech Secondary: Keen Aesc with +2 Max Ammo and +2 Simultaneous Special: Daedal Warp with +1 Air Warp and +150 ms Time Mobility: Empyreals – mods optional Body: Augmented Hyrst with +5 Movement Speed Implant: Inferior Salites – optional
Ironclad
Weapon: Sinful Sledge with +50% Knockback Resist and +1 Extra Hit Secondary: Insidious Kyeser with +2 Max Ammo and Seeking Special: Banded Mantlet with +50% Knockback Reist, +40 Speed, and Reflect Mobility: Augmented Sabatons with +1 Jump Height and +3 Movement Speed Body: Augmented Plating with +5 Movement Speed and +5% Damage Implant: Inferior Salites – optional
Fabricator
Weapon: Fellwhip Dancer with -100 Cycle Time and +100 Range Secondary: Mangonel !!Important!! – mods optional Special: Inverterate Macron with +1 Simultaneous Mobility: Augmented Valenki with +4 Movement Speed Body: Augmented Woven with +5 Movement Speed Implant: Inferior Salites – optional
Important Notes
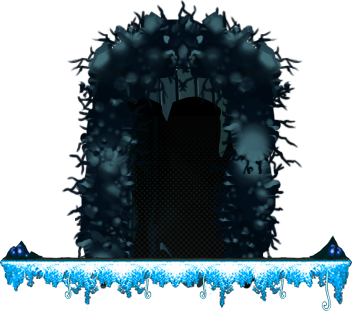
There are platforms that look like this scattered throughout the map: 
It's important that you immediately jump off of these when you see them. The claws on the end will reach out and grab at the player, doing an extremely high amount of damage and knocking the player off balance. If you need to jump to a platform and the claws are already out, wait for them to retract. Touching them at all while they are out will damage you and stop you mid-air, causing you to fall where you were hit.
First Half
Enemies
Gnat

HP: ?
Contact Damage: ?
Projectile Damage: N/A
Strategy:
Fight any Gnats you come across above at least one platform. They tend to go off screen to build up speed and bullet back towards the player. If these catch you off guard they can easily knock you off.
Sporb
HP: ?
Contact Damage: ?
Projectile Damage: N/A
Strategy:
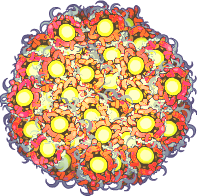
Sporbs are a lot slower than Gnats in their movement, but still accelerate over time. After enough damage, the Sporbs break down into smaller pieces, eventually breaking down into the tiny Gnats. The same strategy for the Gnats applies here.
Bouncer

HP: ?
Contact Damage: ?
Projectile Damage: N/A
Strategy:
These do a decent amount of damage on contact, but are pretty easy to avoid and kill. Unfortunately these can sometimes be found spawning in groups, making them a lot more difficult to handle. Bouncers will jump after you in mid-air and can stop you in motion. Make sure to kill them before trying to jump over a gap.
Bouncer Sac
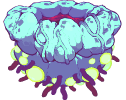
HP: ?
Contact Damage: ?
Projectile Damage: N/A
Strategy:
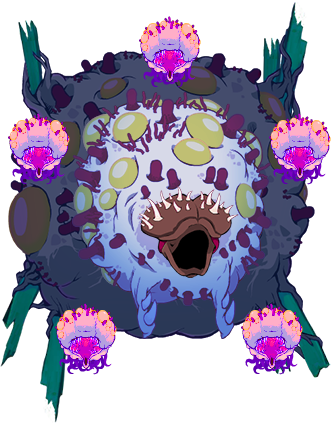
Bouncer Sacs spawn the Bouncers. They're fairly tanky so make sure you have enough room between yourself and the Bouncer Sac to deal with any Bouncers that it might spawn. They also spawn underneath platforms, occasionally with nothing underneath. Make sure not to accidentally fall if you're trying to get up close to kill it.
Luminescent Arachnid
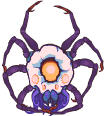
HP: ?
Contact Damage: ?
Projectile Damage: ?
Strategy:
Arachnids shouldn't pose a threat at all. The only time they attack is if you are directly underneath them. Even then you still have enough time to move out of the way. They also have a small amount of health so killing them is easy enough.
Maggot Hunter

HP: ?
Contact Damage: ?
Projectile Damage: N/A
Strategy:
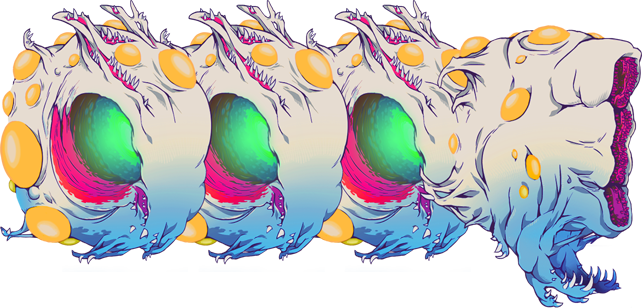
Believe it or not, these centipedes are one of (if not) the deadliest monsters in Strands. They have the ability to clear massive gaps in platforms. This makes them especially dangerous when they're blocking the only path ahead. Do not try to jump across if you aren't confident in your ability to get past it to a safer area. These Maggot Hunters also have the ability to hit you mid-air, causing you to fall where you were hit. This happens a lot more frequently than you think, so make sure to kill these before attempting to navigate any further if you are on dangerous grounds. Once broken they break into their smaller sections that patrol back and forth on the platform they landed on.
Maggot Jumper
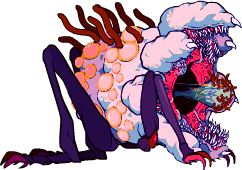
HP: ?
Contact Damage: ?
Projectile Damage: N/A
Strategy:
The only thing you should have to worry about from Maggot Jumpers are their bulkiness which helps them take up a bunch of maneuvering room. Outside of that they are incredibly slow and their attacks are very easy to predict. These are a no-brainer.
Maggot Soldier
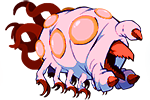
HP: ?
Contact Damage: ?
Projectile Damage: ?
Strategy:
Maggot Soldiers are annoying in large quantities. They have the ability to quickly reproduce if they aren't taken care of. Their only attack is to drop more Maggot Larvae which in turn become Maggot Soldiers. You can see why this can rapidly get out of hand.
Maggot Larvae

HP: ?
Contact Damage: ?
Projectile Damage: N/A
Strategy:
Maggot Larvae are dropped by Maggot Soldiers. They have the ability to turn into an egg and hatch into a Maggot Soldier. These are easily killable in their larvae form, but they become significantly more tanky when they transform into an egg. However, even in egg form, they can still be killed before transforming into a Maggot Soldier.
Acidic Turtle
HP: ?
Contact Damage: ?
Projectile Damage: ?
Strategy:
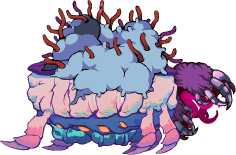
Acid Turtles may catch you off guard at points because their acid can drop from off screen and hit you. Outside of that, these are also pretty easy to take out. One thing to note is that killing the infestation on the turtle and then hopping on its shell will cause the turtle to spit acid that harms enemies instead. The turtle can also be useful for crossing gaps and navigating the level easier, although the turtle does fly automatically without a specific path.
Mid-Boss: Queen Maggot
HP: ? Contact Damage: ?
Projectile Damage: ?
Strategy:
This mid-boss is by no means easy. In fact, the majority of times you play Strands you will have at least one person home out (assuming they don't die in the process). The mid-boss is multi-phase, and quite a bullet hell. Now, if you're lucky, you'll have at least one Fabricator in your group with a Mangolet. These mortars deal an insane amount of damage and make this mid-boss look like a cake walk. But if you're doing this fight without one then it gets a bit tricky.
Phase 1:
When entering the boss room, you'll probably already have red bullets flying at you. They're tiny at first, and easy to dodge. Use this to your advantage and dish out as much damage as you can. If you're in a smaller group, kill the turrets orbiting the Queen first to remove some pressure.
The Queen's phases are divided up based on her speed. Her first phase has her standing completely still, so this phase is a cake walk. To progress through the phases, the group must damage the center piece enough to cause her to spawn her next wave of turrets.
Phase 2:
After damaging the center piece enough, the Queen will start to orbit in a small circle. You'll also notice that the turrets begin to move outwards as more turrets take their place. This happens if the group rapidly damages the center piece without killing any of the turrets first. The large amount of turrets can quickly cause a bullet hell, so don't forget to kill the turrets once in awhile as well.
Phase 3:
The queen's last rotation phase will cause her to rotate in a large circle very rapidly. This phase can be a pain if you haven't killed the turrets, because their reach can nearly extend to the entrance of the arena itself. Contact with the turrets also causes a lot more damage so this can be even more dangerous depending on how many turrets there are.
Phase 4:
The last phase is a bit easier, especially if you've cleared up the outer turrets. The queen, instead of rotating, now lunges at a random player in the arena. Her reach doesn't extend very far though, so feel free to clear turrets and get up in her face. With enough DPS on the center piece, Phase 4 goes by pretty quickly. Once the center piece is killed, the Queen and all of her turrets die. So don't worry about clearing up any leftover turrets.
Second Half
Enemies - the second half includes enemies from the first half with the addition of the enemies below.
Glow Worms

HP: ?
Contact Damage: ?
Projectile Damage: N/A
Strategy:
Glow Worms are annoying as hell. Their tracking AI will give you serious problems in tight maneuvering areas. If you move to a position perpendicular to the Glow Worm, it can instantly make a 90 degree turn with its head without moving the rest of its body. Not only does this box you in, but it gives the Glow Worm a direct path to you. To top it all off, Glow Worms do have a fair bit of health and can take a beating. Large groups of Glow Worms can become a nightmare.
Boss: Polaris
HP: ? Contact Damage: ?
Projectile Damage: ?
Strategy:
IMPORTANT NOTES:
This boss can insta-kill you if he hits you directly with his mouth. However, the boss will give a forewarning via it's light on the front of its head. This can be seen as a yellow light at the edge of the screen. When a yellow light appears, immediately move either up or down out of that area to avoid being gibbed. Even if you have to take some damage from a needle, it's preferable to taking 999999 damage and losing all of your progress. With that out of the way, let's get into the nitty-gritty.
Phase 1:
When entering the boss room, if the worm hasn't spawned yet and the yellow light hasn't activated on the edge of the screen, immediately jump up to the middle of the arena. You should always prioritize staying as close to the middle of the arena as possible. The boss typically attacks closer to the edges, so this gives you the best chance at both hitting the boss and avoiding its attacks.
You will have to occasionally move from the center towards either the top or bottom of the room. As soon as you see the tail of Polaris passing by, immediately jump back down to the center if there is no yellow light. When attacking Polaris after you've moved, there's some things you need to be aware of.
Polaris has the ability to spawn Glow Worms. And he can spawn a lot of them. However, Polaris doesn't spawn Glow Worms so long as you only attack the head. This means that less damage to the body = less Glow Worms for you to deal with. To make it an even more enticing deal, all shots to the head count as armor piercing shots, while Polaris' body is armored (however, armor piercing still fully damages Polaris' body, the only difference being that Glow Worms still spawn). The overage of damage you do to Polaris' body will determine how many Glow Worms he will spawn on that pass.
Not only can Polaris spawn Glow Worms, he can spawn massive needle balls that have three different forms. The first form travels quick, and hits even harder. In fact, the first form can easily knock out half your health. However, the first form doesn't last very long, so if you move out of the way then you shouldn't have any trouble with getting hit. The next form is shaped like a worm head, and comes in five parts after splitting. These move a lot slower than the first phase, but travel for a bit longer. The next form is shaped like a needle, and also comes in five parts. Except its five parts for each worm head part, making it a total of 25 needles.
One way I dodge these if I'm trying to stay towards the center is by hopping in the middle where the ball form exploded. This puts an equal distance between you and all five worm head parts. Not only this, depending on how close you can get to where the ball exploded, once the worm heads all explode none of the needles can reach you. If one of the needles does get close, usually they are spread out far enough by that point that you can easily hop over or duck under it.
Polaris' phases are broadcasted pretty obviously. After enough damage is done to him, you'll hear Polaris roar, followed by the screen shaking. After the shaking stops, Polaris will enter Phase 2.
Phase 2:
During Phase 2, Polaris' only different will be his increased speed as well as the increased amount of needle balls he can fire out. The main goal here is the same as before, remain in the middle as much as possible while dishing out damage to Polaris when you can.
Phase 3:
Polaris' final phase can be a downright clusterfuck. What changes about Polaris' final phase is that he can now wrap back around, having his front half and back half on the screen at the same time. This can severely constrict the space you have to work with. Now here's why spawning Glow Worms on Polaris' last phase (attack his body) is a bad thing. When working with such limited space, Polaris' worms will all home in towards that space. On top of that, you have the needle balls you still need to dodge as well. Spawning as few worms as possible on Polaris' last phase is probably the best piece of advice I can give.
Some maneuvering tips for Polaris' last phase come from his first phase. When you see his tail pass, move to where the tail just left if you need a breather. Polaris (at least from what I've seen) won't attack in the same spot twice in a row. This is nice if you need some room to move around in for killing any Glow Worms that were spawned. This also gives you room for the trick with dodging needle balls I mentioned earlier. His last phase does last a bit longer because the group isn't able to focus as much on DPS, but it shouldn't take long for Polaris to finally go down after he enters Phase 3.
Once Polaris is dead, make sure you or your group clear any remaining Glow Worms, as they don't de-spawn once Polaris dies. Once the worms are dead, make sure to collect your loot (and don't fall doing it)!
The End!
If you beat Polaris, congratulations and hopefully you got an awesome Soidal, Forceful Push, Gavotte, etc. If you didn't beat him this time around, then definitely don't give up. It took me several deaths just to get to Polaris due to me falling through gaps in the ground. I've also lost count of how many times Polaris has gibbed me as well. Losing sucks, but it makes winning that much better.
Now once you've beaten Strands, you can work on beating it multiple times to get familiar enough to farm it for the really good gear that Polaris can drop (2-shot Soidal Repeater, 250 Cycle Time Gavotte, etc.). Good luck and see you in game!
