Table of Contents
Zethin's Guide for New Shells
Welcome to Eschaton!
If you haven't already, I'd first take a second to get familiar with the controls. Feel free to also explore Eschaton (the starting area with the big statue in it), but don't quite hop into any portals just yet.
Here's a quick overview of what you can find in Eschaton:
Zones
Portals found in Eschaton lead to zones within the game where you can gather boosts for your character as well as bigger and better equipment. There's two types of zones: regular and elite zones. Both of these are separated by their respective difficulty levels. Additionally, regular zones are generally found on the left side of the map, while elite zones can be found on the right side of the map.
A larger zone called “Star Cathedral” can be found adjacent to where you spawn in Eschaton. This is a massive zone and intended for a large amount of well-equipped players who are already versed in the games mechanics.
Home
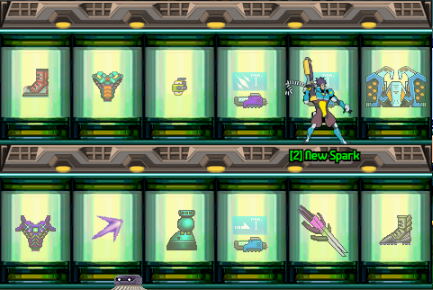
Your home contains a couple of really important features inside of it, and can be accessed by either pressing “H”, or by moving to the open pod to the left of the spawn in Eschaton and pressing “A”.
Inside your home are multiple pods which contain shells. Once you've satisfied the requirement and unlocked them, upon death, you can respawn as one of these new shells. Each shell comes with its own unique playstyle and gear.
Second is your stash. Currently this can hold up to six items. What's important about your stash is that items placed inside it do not disappear upon a player's death. While the stash is open, you can hover over items in your inventory and press “D” to stash them, or equip items from within your stash by pressing “Shift+A.” Alternatively, if you want to just take items out, simply press “A” on them.
Shop
You may have noticed a currency feature in the top left corner called “EC.” This is used to purchase items from shops and can only be found within zones. However, don't waste your EC here. There are other shops that can spawn within zones but cost thousands of EC which you should save up for. On top of this, much of the gear can be found, but better, within the very first zone.
Now that you've got a pretty clear picture of everything Eschaton has to offer, let's take a quick look at the UI.
UI
There's two important screens to look at for the UI. The first opens when you hit “I” or “Tab”, this is the inventory screen. Not only does it show you your gear that you're carrying, but it also displays your status on the far left of the screen.
The status contains your total stats in numerical form, as well as your character's name, shell, and deeds. This is useful if you're trying to calculate the benefit of a particular weapon and are trying to min-max your character.
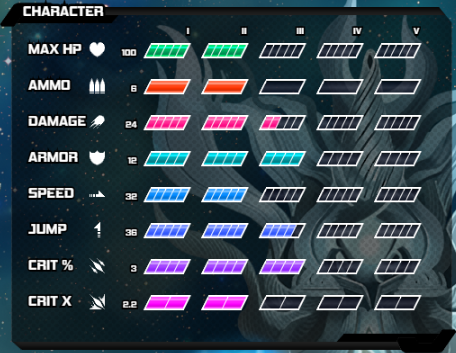
The second important screen opens when you hit “C.”
This is the boost tracker, and it displays the amount of boosts you have gathered over the course of that shell's life. The bars are sectioned off by tiers. As you move up in the difficulty of zones, higher tier stat boosts will drop. However, if your stat is in the middle of Tier 1 and you get a Tier 3 boost for example, it will still only increase it within Tier 1 by one point.
This means that every boost gives the same amount, but once you maximize a tier then that tier's boosts will no longer benefit you.
Your First Zone: Fire Forest!
Now that you've got the grasp of pretty much everything Eschaton has to offer, you're ready to start your first zone! The zone intended for new shells is called Fire Forest and can be found directly to the left of Eschaton's spawn point.
Make sure to read up on all of Fire Forest's Enemies so you have a good idea of what you're going up against before proceeding through the zone.
Usually there will already be several people within the zone, so your best bet is to follow behind them and take out enemies as you can. Make sure to not rush to the front of the pack because as a new shell you're susceptible to a lot more damage than players who already have significantly higher armor stats!
While exploring, you'll likely come across several things on the way to the mid-boss. The first and most important are chests.
These can contain gear, EC, and health. The gear that drops isn't always for your character, but if you plan on playing a different shell then be sure to save it in your stash for later.
The second thing you'll come across are stat boosts.
Lastly, you'll come across ammo pouches. These simply replenish one ammo to your supply. About half way through the zone, you'll encounter your first real challenge.
Mid-Boss: Hopper Queen
The hopper queen is a fairly easy mid-boss to tackle, especially with multiple people. The only thing you have to watch out for are her fire bullets she fires upwards. Once she fires these, they split apart into smaller fireballs. As long as you move out of the way, these will be easy to dodge because of how slow they fall.
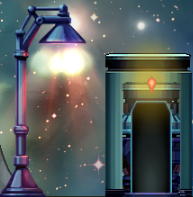
Once she dies, she'll always drop a chest which has better gear than average chests within zones. After gathering your spoils, head on through the door. The rest of the zone will be pretty similar to what you've already done. However, after a few more rooms you're going to come across a door like this:
Stop and read what's below!
Doors that are significantly larger than the doors you've come across before indicate a boss in the next room. Make sure you are well stocked on health because this can be a difficult fight for newer players. Additionally, make sure you are not the only person going into the room. Unless you are extremely confident in your skills, it's unlikely you will be able to solo this boss.
Boss: Leaping Lobster
Before you head inside, I suggest you check out Ratburntro44's Guide to Surviving Fire Forest Boss as a Noob Wildfire.
Bosses are significantly stronger than any enemies, including the mid-boss, within the zone. In addition, all exits are blocked. For this reason, in later zones you will usually see players teleport out of the zone once they come to the boss door. This is because bosses in later zones make it nearly impossible to zone out once you've entered the room.
Following Ratburntro44's guide, if you were well-stocked on health and had some people to assist in dealing damage to the boss, the fight shouldn't take too long to end.
After a boss fight ends, they also drop their own chest. There are several items unique only to boss chests. Some of these include: gear, keys, implant slots, and implants. After the boss, you likely gathered a lot of cool new gear and some keys as well.
Keys and Star Cathedral
Now that you've beaten the Leaping Lobster, you can exit out of the zone from the right side of the map. This portal will take you back to Eschaton's starting point.
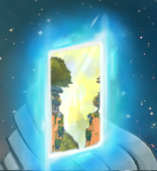
If you hit open your inventory and move the selection over to the bottom right, you'll notice that you now have some keys. Keys are used to open more difficult zone for everyone in Eschaton. Portals that need a key to be opened have a dull picture in the center, while portals that are already open are more vivid.
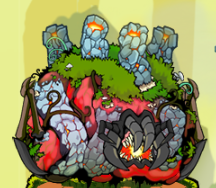
However, keys also serve a secondary purpose. To the right of the spawn is a massive monument with several pedestals on it. Each of these pedestals represents a unique key. After enough keys have been deposited (indicated once you are standing on the respective pedestal), a new and extremely difficult zone will open called “Star Cathedral.”
Star Cathedral is an extremely difficult zone intended for experienced players. This is the only zone where Tier 5 boosts currently drop, which are intended for players who have already maxed out their boosts up to Tier 4.
Final Notes and Next Steps
Hopefully you've gained a clearer picture of what StarBreak is all about and are ready to get into the thick of the game, which really starts with Tier 2 zones.
For your next zone, I recommend proceeding into Vanquished. This zone I've found to be a lot easier than Fungus Cave, and usually has a good amount of people running it as well. The same principles in Fire Forest apply to the rest of the zones, so use that knowledge to your advantage.
You will likely die quite a bit on your way through the dungeons and lose a lot of good gear, so don't forget to stock up your stash and get back out to try again! Once you're feeling more experienced in the game, you can even skip to the elite dungeons to build back up instead of regular dungeons as well.
That's all I have for this guide though, hopefully I'll see you guys in game!
