Table of Contents
Zethin's Guide to Fungus Cave
Fungus Cave
Gearing Up
Before starting Fungus Cave, you'll ideally want to have finished Fire Forest at least twice. You'll preferably want to have beaten Vanquished at least once as well. This is not only to up your stats to a level that can handle the damage some of the enemies put out, but to also give you some better gear to work with. This is especially important for mobility during the final boss.
Generally speaking you'll have a much easier time once you've maxed your Tier 1 stats from Fire Forest (all stats) and Tier 2 stats from Vanquished, specifically armor and damage.
Here's a good starting point for where you want to be gear-wise in order to successfully complete Fungus Cave if you're new or having problems running it (but doesn't necessarily guarantee success, this is simply a good baseline, stats and dodging are both equally important as well):
Wildfire
Weapon: Compound Repeater with +100% AP and +2 Shots
Secondary: Contrived Frag with Barbed and Trisected
Special: Withering Blast with +1 Air Blasts
Mobility: Empyreals with mods optional
Body: Durable Jerkin with +4 Movement Speed and +5% Damage
Implant: N/A
Duskwing
Weapon: Cobalt Skein with +1 Extra Hit and +1 HP Leech – 400 spin time preferred
Secondary: Falcate Aesc with +2 Max Ammo
Special: Beloid Warp with +1 Air Warp and +150 ms Time
Mobility: Empyreals with mods optional
Body: Durable Hyrst with +5 Movement Speed
Implant: N/A
Ironclad
Weapon: Vengeful Sledge with +100% AP and +1 Extra Hit
Secondary: Caustic Kyeser with +2 Max Ammo and Seeking
Special: Fortified Mantlet with Reflect and +50% Knockback Resist
Mobility: Durable Sabatons with +3 Movement Speed and +1 Jump Height
Body: Durable Plating with +5 Movement Speed
Implant: N/A
Fabricator
Weapon: Everdawn Dancer with -100 Cycle Time and +100 Range
Secondary: Invidious Antiphon with Quick Summon and +2 Blockers
Special: Recalcitrant Macron with +1 Simultaneous
Mobility: Durable Valenki with +4 Movement Speed
Body: Durable Woven with +10 Movement Speed
Implant: N/A
These are just ideal setups in order to give you the best shot at beating Fungus Cave. It's definitely not a mandatory requirement to have all of these mods, but having them will give you a better chance at survival. With the gear I've suggested, you'll definitely want to join a group of players going through the zone. With this gear, even a small group of similarly geared players will find the boss to be rather resilient.
Important Notes
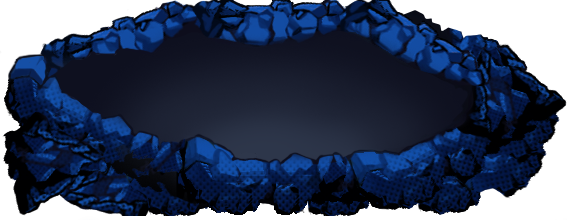
You may come across light blue strips on the ground that look like glowing pools. If you jump onto these pools, they'll restore 50 HP to your character. Use these to your advantage if you're running really low on HP. However, they're pretty rare so don't rely on them being around too much.
First Half
Enemies
Acid Drip

HP: ?
Contact Damage: 10
Projectile Damage: 25
Strategy:
Because this mob's projectile damage is so high, if you can clear the sides of it first and attack it from an angle then that is your safest bet. The mob itself doesn't have much hp so it should be easy to bring down once you've got an opening.
Wasp Worm

HP: ~20-30
Contact Damage: 10
Projectile Damage: N/A
Strategy:
Wasp Worms have a tricky attack pattern that can cause them to be hard to dodge: they'll come to a complete stop before charging at you at with high speed. The best way to kill these is to juke them into charging into a place that gives you a good shot on them. Usually they'll get stuck on edges so you can hit them around corners easily for melee shells as well.
Hive

HP:~300-500
Contact Damage: N/A
Projectile Damage: N/A
Strategy:
You'll want to kill these ASAP because these spawn Wasp Worms on a timed interval. They're also pretty bulky so they'll probably get at least one Wasp Worm out before dying. Kill any Wasp Worms that spawn before attacking the Hive again to keep the pressure off. Multiple Wasp Worms at once can lead to problems without decent AoE damage.
Burrowing Wasp Worm

HP: ~5
Contact Damage: 10
Projectile Damage: N/A
Strategy:
Just watch the ceilings while navigating Fungus Cave and you should have zero problems with these. As long as you're checking the ceilings before rushing through the zone then you shouldn't ever be hit by one of these.
Melee Mushroom

HP: ~100
Contact Damage: 25
Projectile Damage: N/A
Strategy:
This guy packs a punch if you aren't well armored and he hits you. It can easily take out a sizable chunk of your health. Stay above his head or below his body and attack from an angle. If you can, attacking from distance is also advised. They'll usually patrol an area, sometimes in groups. Easy to take out so long as you stay back.
Acidic Mushroom

HP: ~50
Contact Damage: 10
Projectile Damage: 20
Strategy:
Probably the most annoying enemy in Fungus Cave next to the Wasp Worms. Acidic Mushrooms have incredible accuracy and hit just as hard. If you want to make fighting them a bit easier, then juking their attacks is a must. Wait for them to burrow down and pop back out, and once they start their throwing animation move out of the way. Once they start that animation is when they have locked onto your position. After they throw the acid, quickly move in to attack as they are vulnerable for a short time before burrowing again.
Sawblade

HP: ~90
Contact Damage: 25
Projectile Damage: N/A
Strategy:
When you find a Sawblade, it's best to hop in front of it and trigger its first roll. You likely won't damage it enough in time before it starts its roll regardless. Once it rolls, just hop over it, do a 180, and go to town on it. The Sawblade is vulnerable for quite a while after its first roll so you should be able to kill it before it spins up again.
Mouthshroom

HP: ~50
Contact Damage: 20
Projectile Damage: N/A
Strategy:
These are also pretty annoying, but their lack of HP makes them easier to deal with. There's not really a great strategy to deal with these, but it's best to take them out first because they can fairly high and catch you off guard if you aren't careful.
Green Blob

HP: ?
Contact Damage: ?
Projectile Damage: N/A
Strategy:
These are one of the easiest enemies to deal with in Fungus Cave and you also shouldn't have a problem avoiding any damage by these. Green Blobs patrol back and forth very slowly, and after receiving a certain amount of damage break open into several Mini Blobs.
Mini Blob

HP: ?
Contact Damage: 10?
Projectile Damage: N/A
Strategy:
Pretty much the same deal as their big brother, just break them down since they don't have any other attacks outside of moving back and forth.
Mini Shroom

HP: ~10?
Contact Damage: 9
Projectile Damage: N/A
Strategy:
These also rush you at high speeds after charging up. If you're having trouble killing them before they reach you, instead of trying to kill them quickly simply wait and hop over them. Once they hit an obstacle they'll stand still for a brief period giving you an opening. If they're sitting on a ledge above you, you can usually trigger their charge and move under their jump to avoid their rush instead of trying to hop over.
Spore Propagator

HP: ~90
Contact Damage: 10?
Projectile Damage: 10
Strategy:
Fairly easy to take care of. Using your secondary on these usually does the trick without putting yourself in too much danger. Just watch for the spores that come down because they do damage you for a decent amount.
Mouth Man

HP: ?
Contact Damage: ?
Projectile Damage: ?
Strategy:
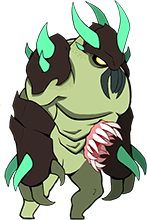
Although Mouth Men look intimidating, they're actually pretty easy to deal with if you're patient. Find a ledge or obstacle, because his echo attack travels quite a distance. However, if the echo hits an obstacle then it bounces backwards. Once the echo bounces backwards, you can follow behind it (but don't touch it) and start attacking. After enough damage is done, the Mouth Man will hunker down, becoming impervious to damage. After a couple of seconds he will open up with an AoE attack which leaves him vulnerable again. After his AoE you can continue to DPS him until he fires off his echo attack, then it's a simple rinse and repeat.
Mid-Boss: Teen Worm
HP: ? Contact Damage: ?
Projectile Damage: ?
Strategy:
These guys look scary just like the Mouth Men, but are also easy to deal with. However, their attacks pack a huge amount of damage if you aren't careful. There's three attacks to watch out for, indicated by a glow on a part of the Teen Worm's body.
The first attack is a bolt-shaped shot of acid. Although it travels slow, it hits for a very large amount of damage. However, it's also easy to dodge usually by ducking, or backing up and simply jumping over it. Ironclads are able to block them as well.
The second attack is a ball-shaped shot of acid. The ball doesn't hit as hard as the bolt, but the ball is a bit more tricky to dodge due to its movement. Once the ball hits the top or bottom walls, it'll bounce off and continue its movement. Once again, Ironclads are able to block these.
Finally, Teen Worms can spray out acid over a short distance. This leaves residue that also damages you on the floor for a short while if you happen to step on it. Watch for it to dissipate before attacking if you are getting within melee range.
Teen Worms don't have a lot of HP and are pretty easy to take down, especially with a decent sized group. If you're having trouble or running low on HP, don't be afraid to hang back. The bolts especially have the ability to one shot you if you are low on health and aren't armored up well.
Note: These aren't officially labeled as the “mid-boss” as of Beta 36, however Teen Worms are placed in the zone at the same point and function exactly as the other mid-bosses.
Second Half
Enemies - the second half includes enemies from the first half with the addition of the enemies below.
Acid Bubble Flowers

HP: N/A
Contact Damage: N/A
Projectile Damage: 10
Strategy:
These are usually found in groups and spit out bubbles of slow moving acid. Although the acid bubbles can be broken, the bubbles start to build up due to their fast spawn rate. It's advisable to clear yourself a path and move on through the level.
Boss: Sarlac
HP: ? Contact Damage: ?
Projectile Damage: ?
Strategy:
Phase 1:
When jumping into the door, you'll fall for a couple of seconds before finding yourself in the boss arena. The first phase is rather short assuming you have some maneuverable people in your group. The first thing you'll notice are Hives scattered across the arena walls. It's imperative that you break these as quickly as possible, because the farther the boss fight progresses the more Wasp Worms that will spawn.
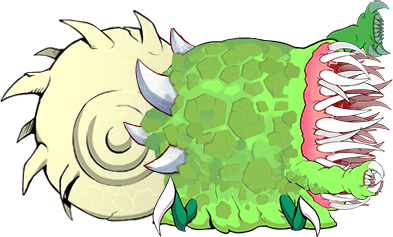
Ideally you'll want to kill the upper half of the hives. This will alleviate at least some of the pressure. Make sure you are keeping an eye for when the mini Sarlacs reel backwards to dodge. Taking a hit from a Wasp Worm is far better than taking a hit from one of the mini Sarlacs. Your group should now target the two Sarlacs with red exposed on them. Breaking these will cause the main bottom Sarlac to lunge upwards.
Once broken, your group should kill any remaining hives on the bottom of the arena. This ensures that you won't be bothered by any extra Wasp Worms while dodging the mini Sarlacs. After the group kills the hives, you're officially in “Phase 2.”
Phase 2:
When fighting the Sarlac, you should ideally stay on the left side of the screen. If you happen to fall into the Sarlac's pit, the left side of his pit is lower than the right side which could give you a chance to jump out. Falling into the Sarlac's pit will do an insane amount of damage so if you fall in and are still alive, hop out as quick as you can. Staying in the pit for any longer will cause him to two shot most characters.
I would consider Phase 2 easier than Phase 1. Continue to kill the mini Sarlacs with red exposed as quickly as possible. All of the mini Sarlacs will continue to lash out until the two exposed mini Sarlacs are dead. If you want to preposition yourself, the exposed mini Sarlacs typically come out slower than the rest of the mini Sarlacs after the boss Sarlac retreats back down.
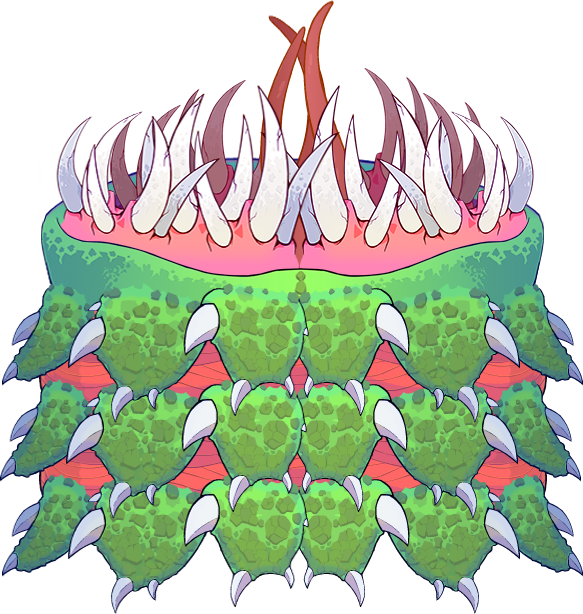
When you see the boss Sarlac lunging up, immediately hop over to one side (the one with the most people) and start wailing on it. You'll start to notice its scales becoming more and more damaged. Eventually the scales will start to pop off and its skin will become exposed, allowing direct armor piercing damage to the boss.
Once you've damaged the skin enough, a significantly larger amount of Wasp Worms will begin to spawn once the boss Sarlac retreats. You'll also notice that there are no longer any exposed mini Sarlacs, which means you've made it to the final stage of the boss.
Phase 3:
The final phase is all about maneuverability. That's why I purposefully picked out movement speed and jump height mods for Ironclads. After a certain number of lunges, the mini Sarlacs will retract on their own and the boss Sarlac will come darting out at a much faster speed. Make sure that you are already at the bottom once the mini Sarlacs retreat or you'll miss your chance to damage the boss.
If you're low on HP, make sure to stay away from the walls and towards the middle if possible. Wasp Worms will spawn not only from the boss Sarlac's hole, but from the mini Sarlac holes as well. Make sure to kill these as quickly as possible to avoid being overwhelmed.
With enough DPS, you should only have to go through 3-4 lunges from the boss Sarlac before he finally is down for the count. Wasp Worms still spawn one more time as the boss lunges up and is killed however, so make sure to dodge/kill them before grabbing your reward.
The End!
If you made it through the boss, then congrats on your well-earned victory. If not, then don't be upset. It took me a total of four deaths before I even got to the boss, then another three deaths before I actually was able to win. Dying now is definitely worth the learning experience. Memento mori!
Make sure to enjoy your new deed and/or gear that dropped if you did succeed. Hopefully this guide has helped you become a bit more confident in your abilities to beat the Fungus Caves. Next up: Underground Base and Strands!


